How To Fletch Arrows
Many serious bow hunters have found that fletching their own arrows is as much of bow hunting as shooting them. Whether you are building new arrows or re-fletching arrows for repair there is a satisfaction of being able to do it yourself. We will cover the equipment needed and the procedure to fletch arrows. There is no difference in the way you fletch aluminum and carbon arrows. The major difference is the tool you need to cut the shaft to length. A tubing cutter can be used to cut aluminum shafts where a high speed arrow saw is needed to cut carbon shafts.
I start with installing the nocks and cutting the shaft to length after I have determined the length needed. I use a high speed arrow saw to cut the shafts to length and install the inserts. Next I clean the end of the shaft to be fletched with pure denatured alcohol or acetone to remove any oil from the manufacturing process and any skin oil. Don't use rubbing alcohol because it is not pure and will leave a residue on the shaft causing the vanes not to adhere to the shaft. Once the shaft has been cleaned, try not to touch the shaft with your hands where the vanes will be glued. You are now ready to start installing vanes or feathers. Whether you choose plastic vanes or feathers there are pros and cons. Feathers tend to be a little faster but make a more noise and are more effected by rain. Plastic vanes are more durable and seem to be more popular with compound shooters.
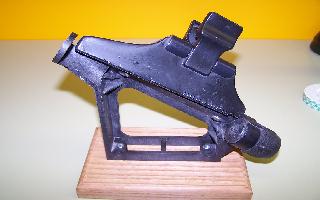
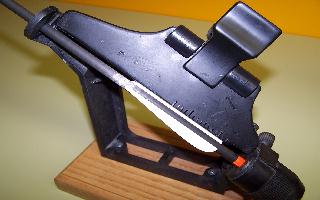
There are several fletching jigs available on the market. I use a Grayling pictured below but Bitzenburger and Jo-Jan also makes good jigs. Jo-Jan also makes a multi-fletcher that will fletch six arrows at a time.
The most common style of fletching is 3 vane set at 120 degrees so that is what I will cover here. There are two positions you can set the cock feather. The first is the traditional set being cock feather out and the second is cock feather down. Arrow rest like a TM Hunter use the cock feather down. To fletch with the cock feather down you need a optional receiver for your fletching jig as most come with the standard cock feather out.
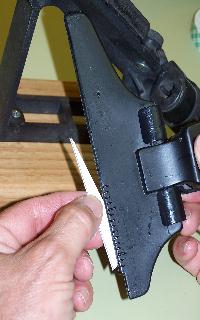
Next you will need to measure how far you want to set the vane from the und of the shaft. I set mine at 1 1/4" from the end of the nock. The clamp has reference marks to line up this measurement. Next index the jig to the starting position or where the cock feather will be.
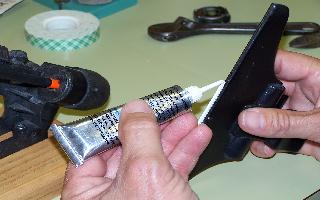
Once this has been done you are ready to apply the glue to the vane and position on the shaft. There are several types of glue you can use on the market. I have used Fletch-Tite and had good results. There are also fast setting glues available that are like Crazy Glue. With either type of glue, once it is applied to the shaft you need to position it on the shaft immediately and allow it to set before removing the clamp. I had gone to the fast setting glue in the last several years with good results. The only down side I have found is that it's much harder to remove from the shaft when you need to repair a damaged vane.
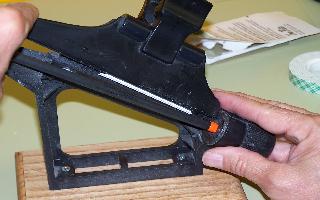
Position the clamp on the jig so that the clamp hits the back of the jig. It is not necessary to hold the clamp in place, the magnet will be enough to hold it.
I like to allow the glue to dry for 5 to 10 minutes on Fletch-Tite type glues or 10-15 seconds for the fast set type glues before I remove the clamp. Once dry, remove the clamp and rotate the jig to the next position and install the next vane.
After installing the last vane I like to put a small spot of glue on the very front end of the fletch at the shaft. I feel this helps keep the end of the fletch from coming loose. I will normally allow about 24 hours curing time before I shoot newly fletched arrows. This may be longer than required but I would not recommend shooting them right away. If you choose to fletch you own arrows, good luck and enjoy.